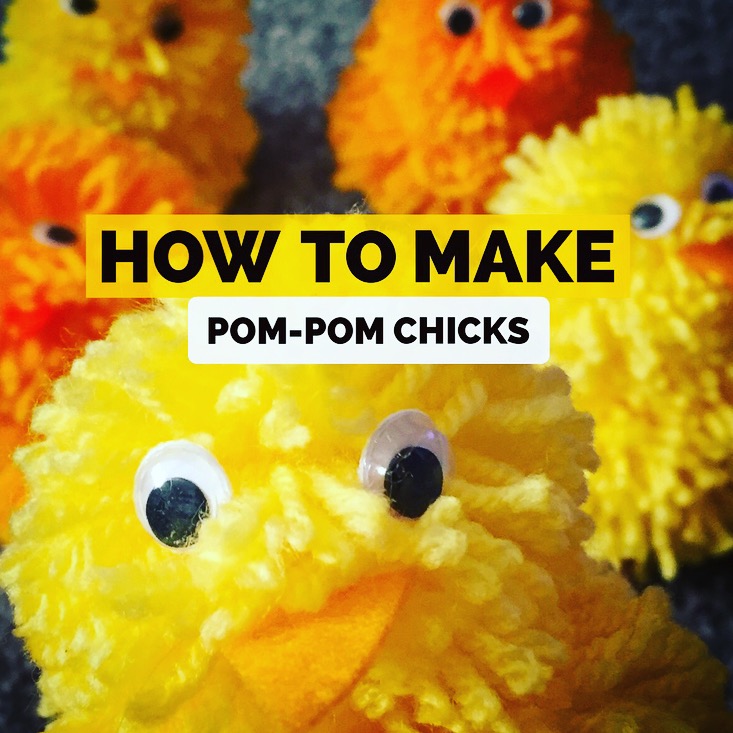

Dear Mummy, we love making pom-poms animals, this week for Easter we have made an Easter chick. It’s actually easier than it looks and great fun to do. This is what we did.
Making pom-poms . . . with a pom-pom maker
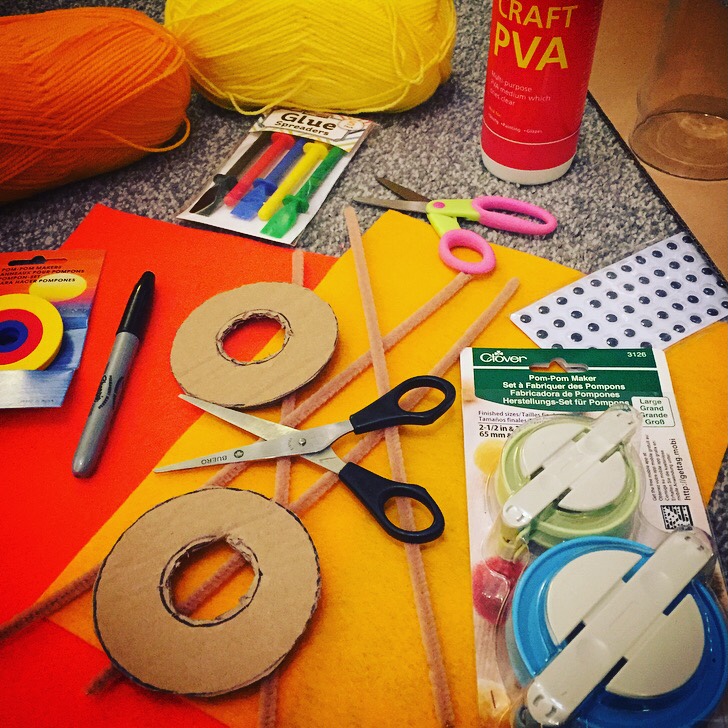
This ingenious little machine allows you to make pom-poms without having to cut out cardboard circles. We picked this Clover pom-pom maker up from Hobby Craft for £6.50.
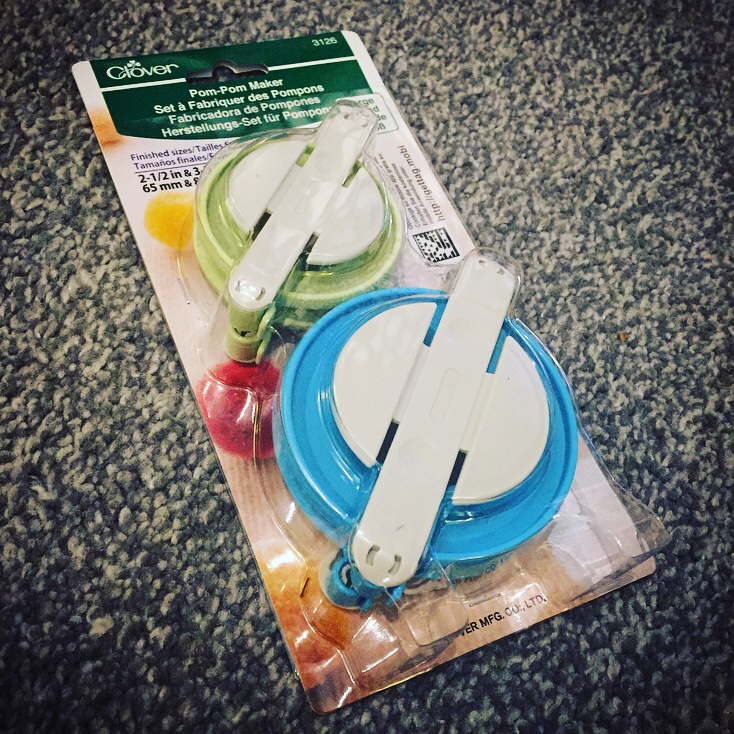
It’s really easy to use and comes in different sizes so that you can make different sized pom-poms. There are two machines in a pack and at first glance it looks like a complicated contraption to figure out, but it’s actually quite simple. We were pleasantly surprised with the results!
You will need
- Wool/yarn
- Clover pom-pom maker
- Scissors
How to make
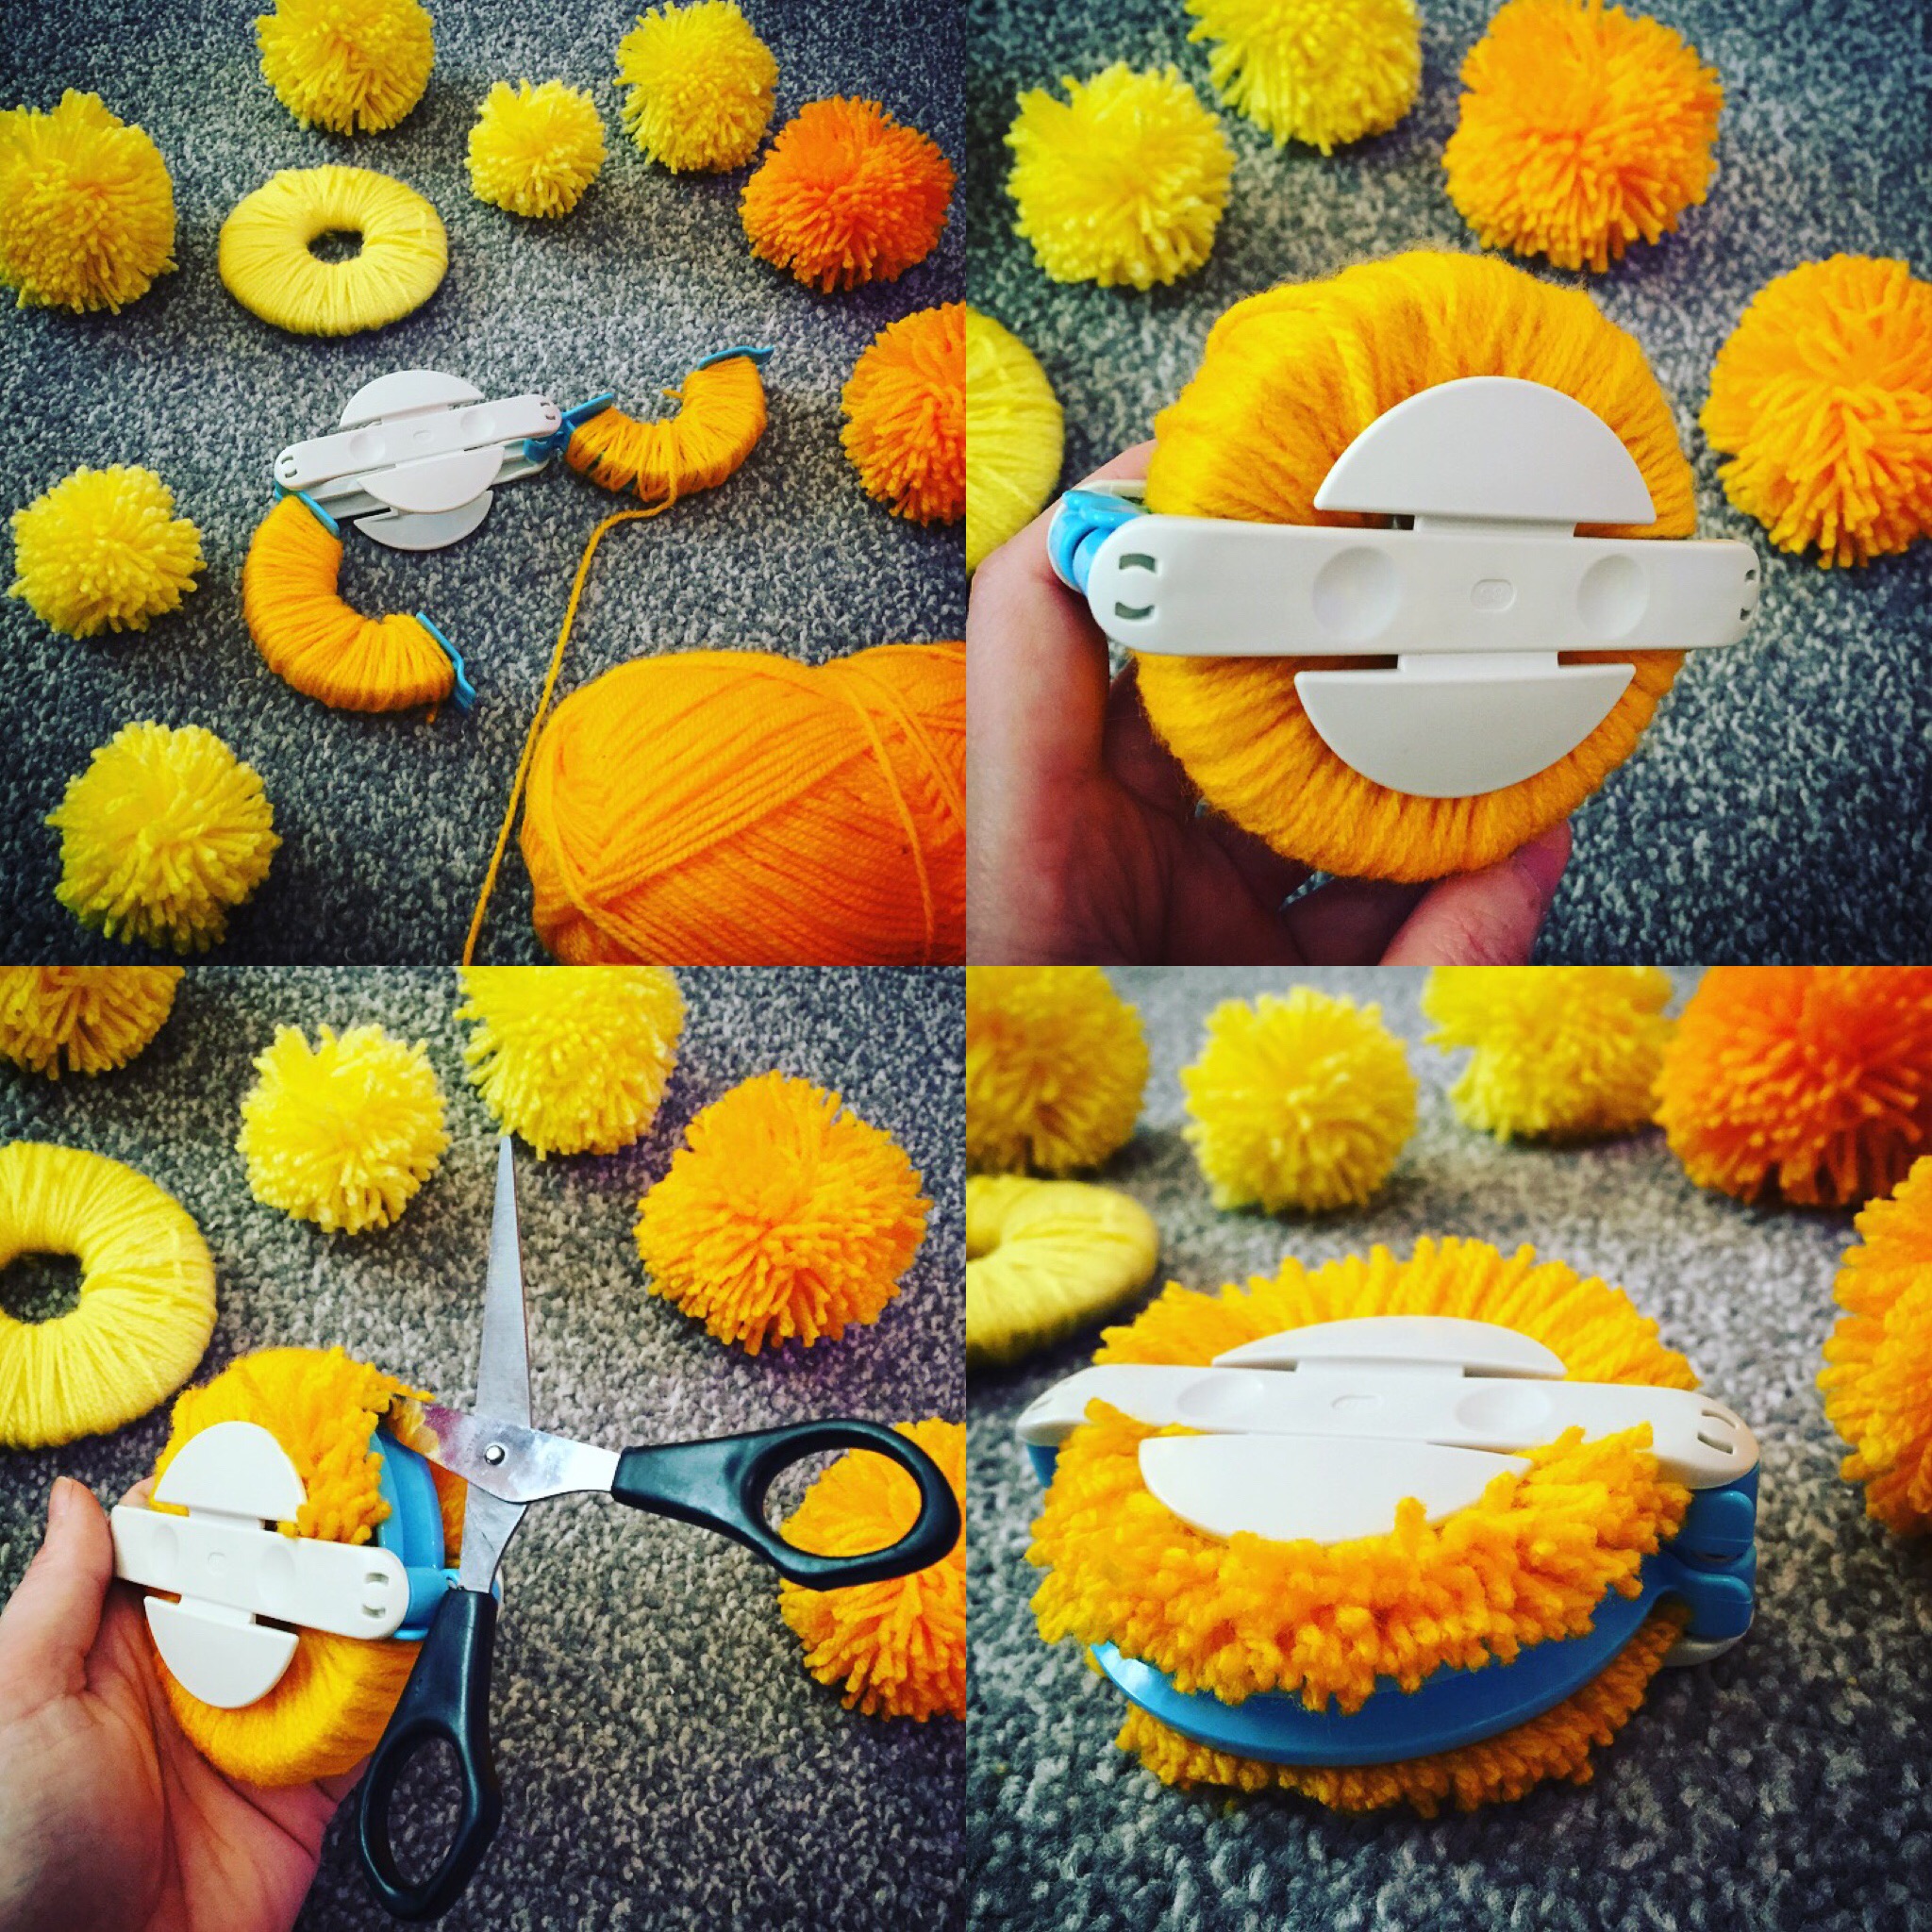
- Wrap your wool / yarn around one of the arcs (one arc is formed of two arms) until it is completely covered.
- Repeat step one for the remaining arc.
- Insert your scissors into the slit on the side of the machine, and cut all of the way around both arcs. I got my mummy to help me with this!
- Insert a piece of wool / yarn into the middle of the machine and pull it tight, secure in place with a knot.
- Gently remove the pom machine by releasing both arcs, and then remove the central sections by gently pulling on both sides.
- Trim your pom-pom to the desired size.
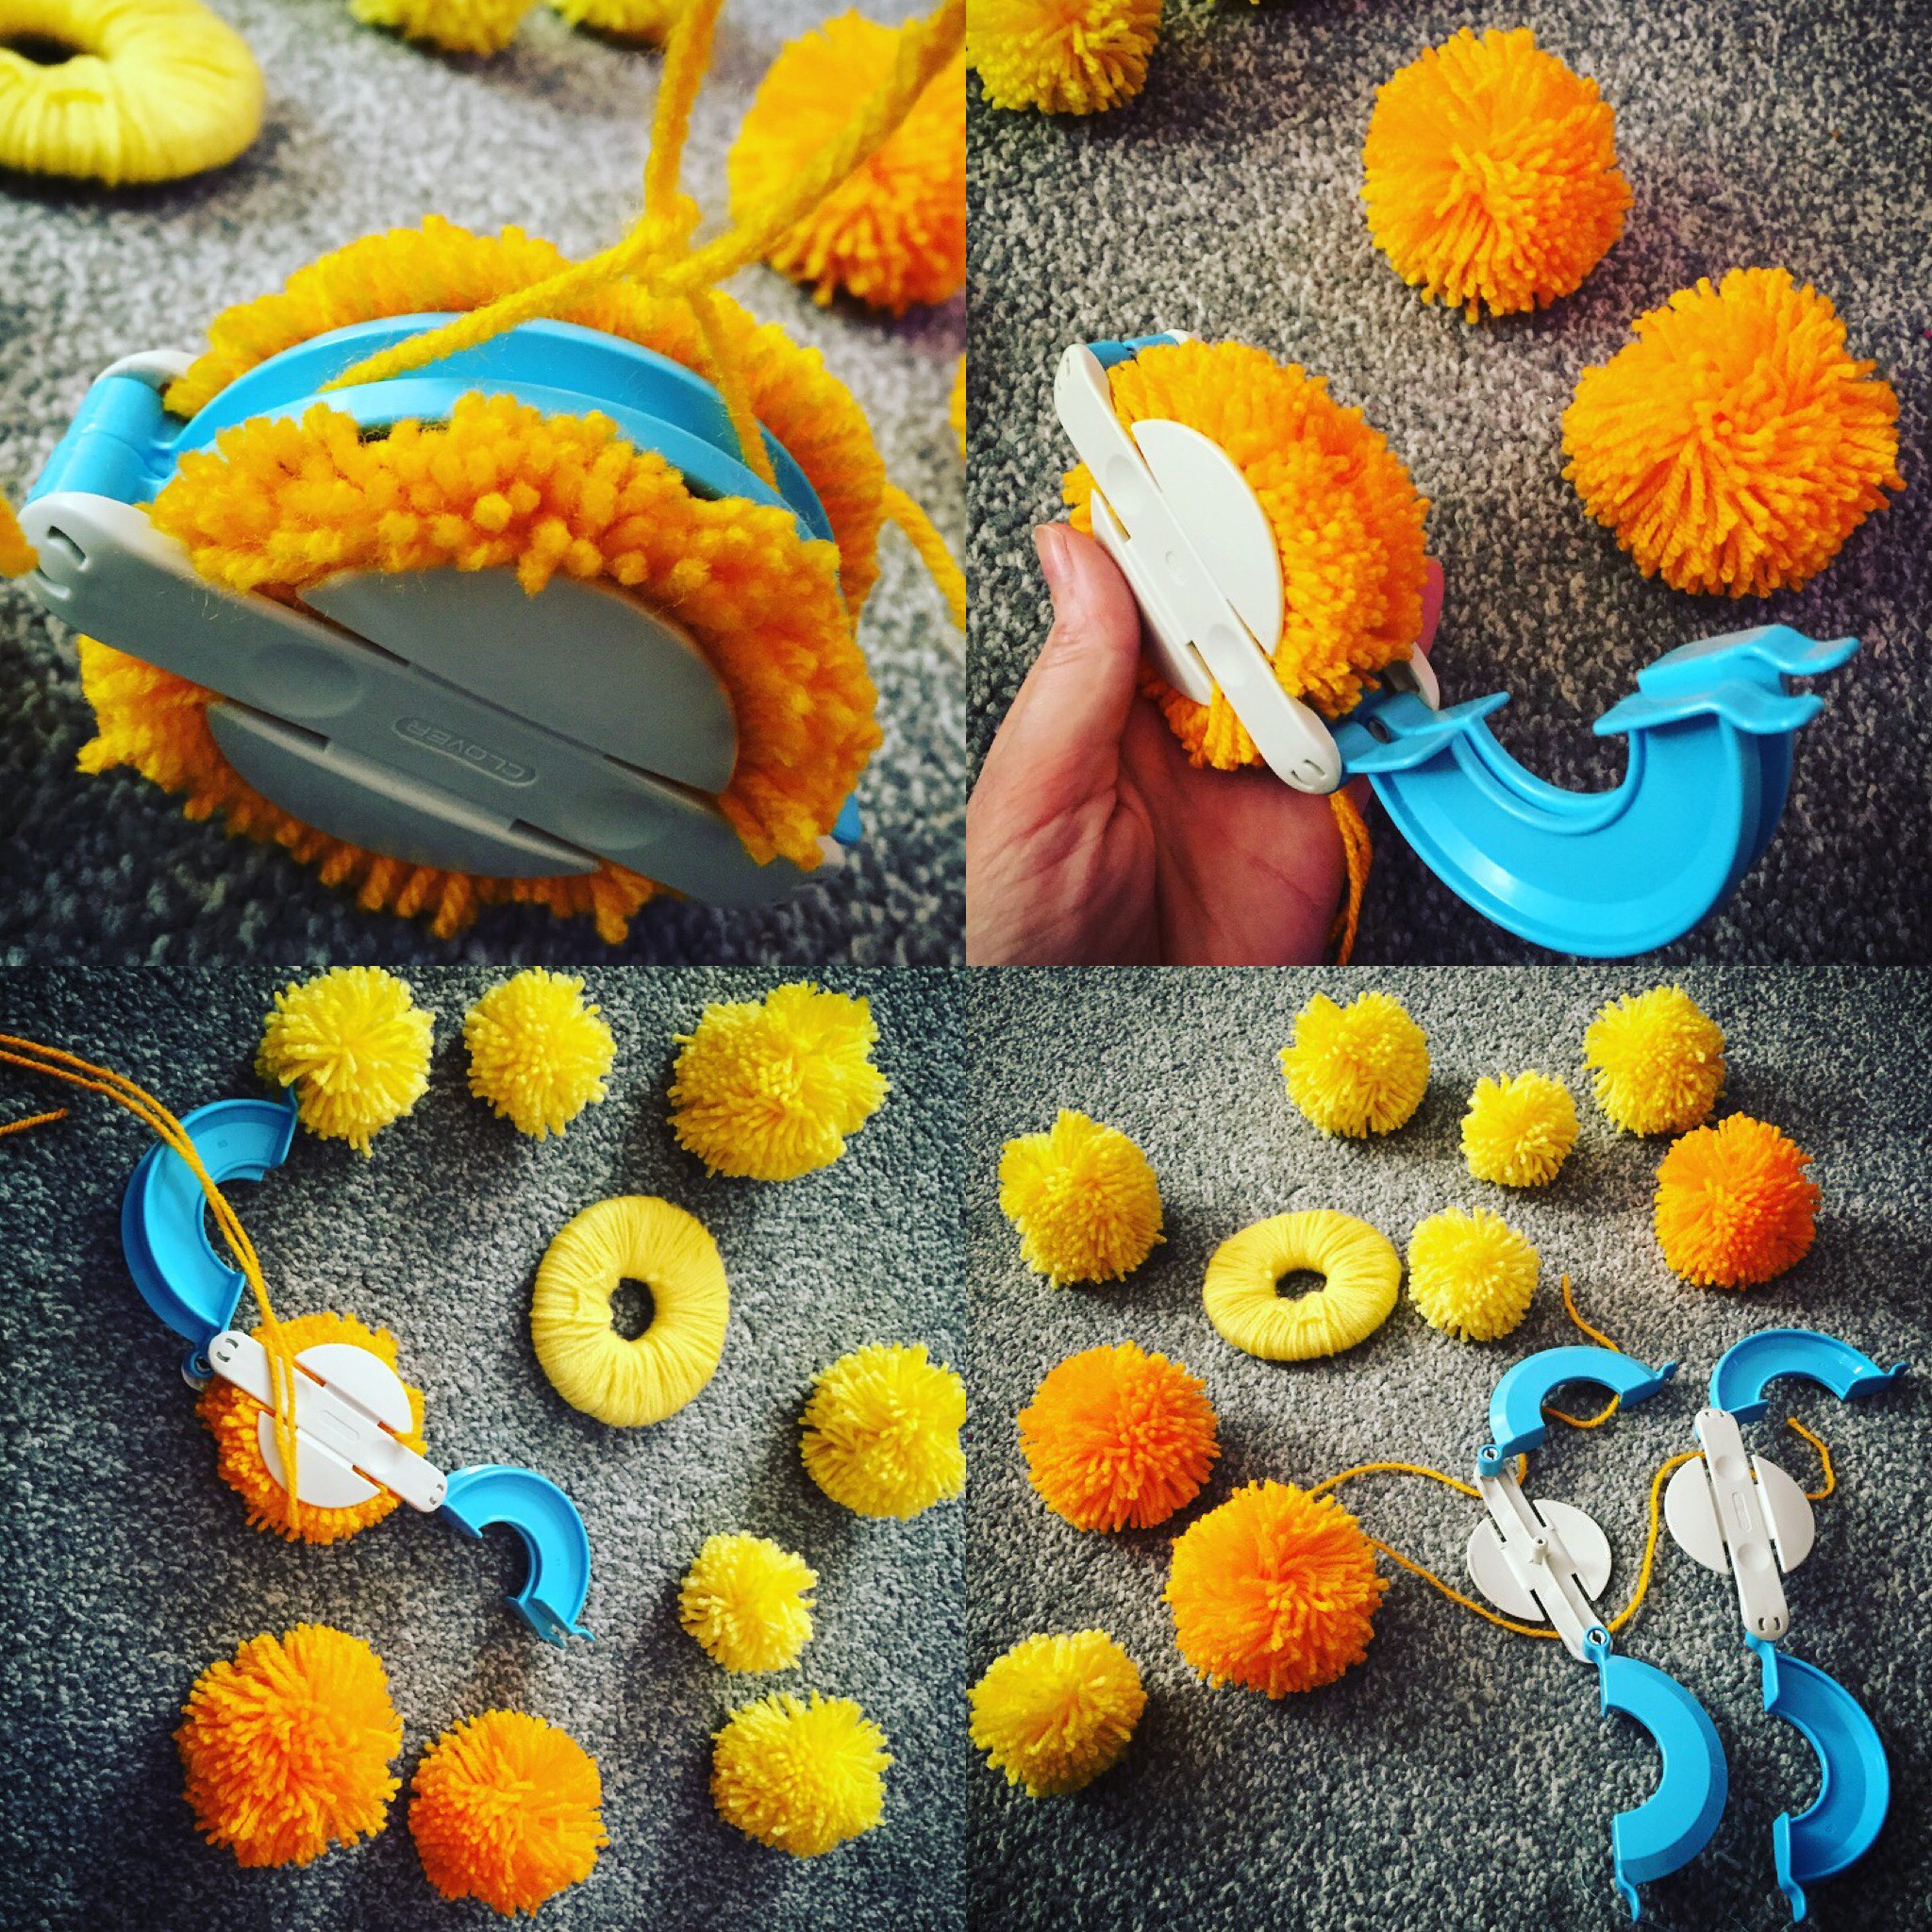
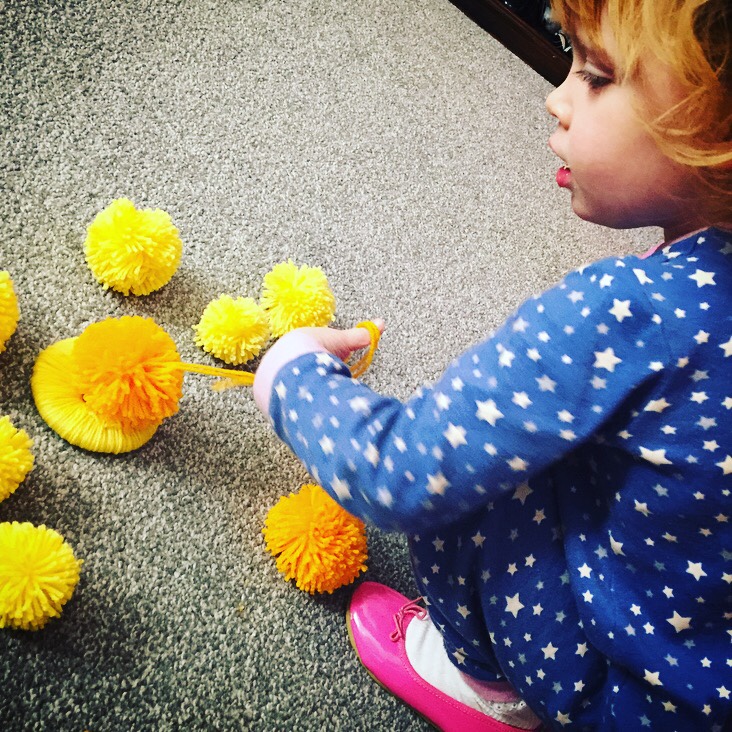
We were really impressed with the results and it was super quick! My mummy made some on her own (when I was in bed) and it took around 5 minutes to make these cool pom-poms!
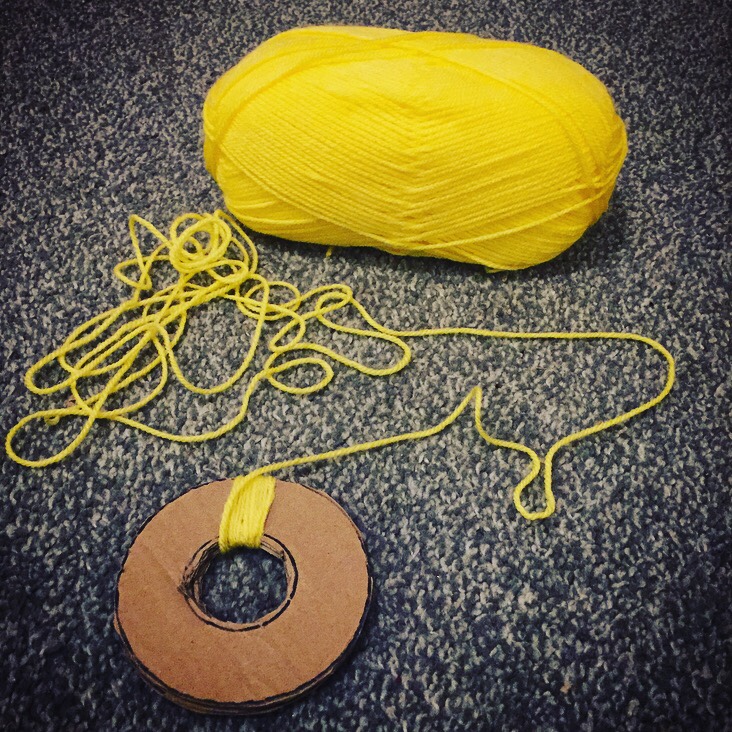
Making pom-poms . . . the traditional way
Making pom-poms this way takes a little bit longer than the other method, however you can easily customise the size of your pom-poms to suit your requirements by simply altering the diameter of the cardboard circles you cut out. It took us ages to feed the wool through the hole in the circle and I kept getting tangled up in the wool. My little fingers found this quite tricky compared to the Clover pom-pom maker! It’s also a bit of a pain to cut out the circles from thick cardboard.
You will need
- Wool/yarn
- Cardboard
- Pencil
- Scissors
How to make
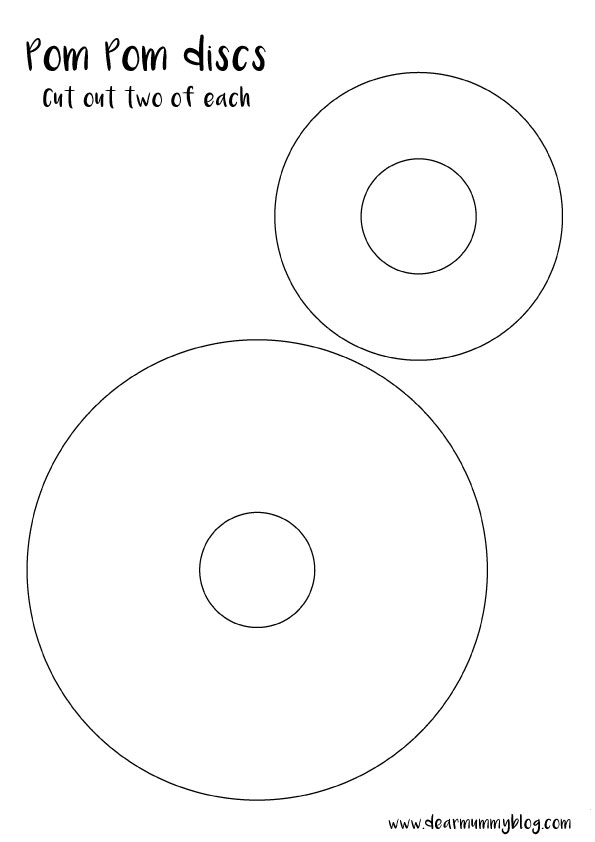
- Cut out two cardboard circles using a circular object as a template (jars and mugs make great templates) with a hole in the middle of each so that you end up with a ‘ring’ shape. Use our pom-pom template
- Hold both the cardboard circles tightly together, and wind your wool / yarn evenly and firmly around the edge.
- Continue winding the wool / yarn around the circles until the central hole is nearly full.
- Using the scissors, carefully snip the wound wool/yarn between the two cardboard circles and continue all the way around until all the wool / yarn has been cut.
- Thread a length of wool/yarn around the centre of the pom-pom, between the two circles of cardboard, then tie tightly to secure. Do not cut off any of the excess wool / yarn.
- Remove the card from your pom by using your scissors to snip into the card, and pull apart to separate.
- Trim your pom to give it even edges.
The larger the diameter of your circle the larger the pom-pom will be, and the more wool you will need to allow for the making. A circle with an 8 cm diameter is a good size to begin with, this dimension can then be adjusted accordingly dependent on the size pom-pom needed in future. You can also mix the wool colours during the wrapping process to achieve a rainbow or speckled effect.
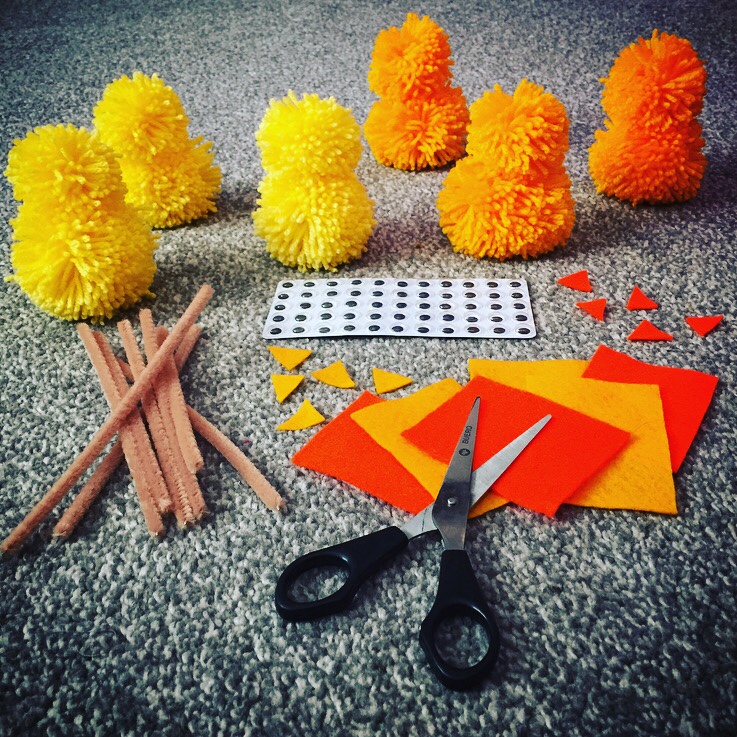
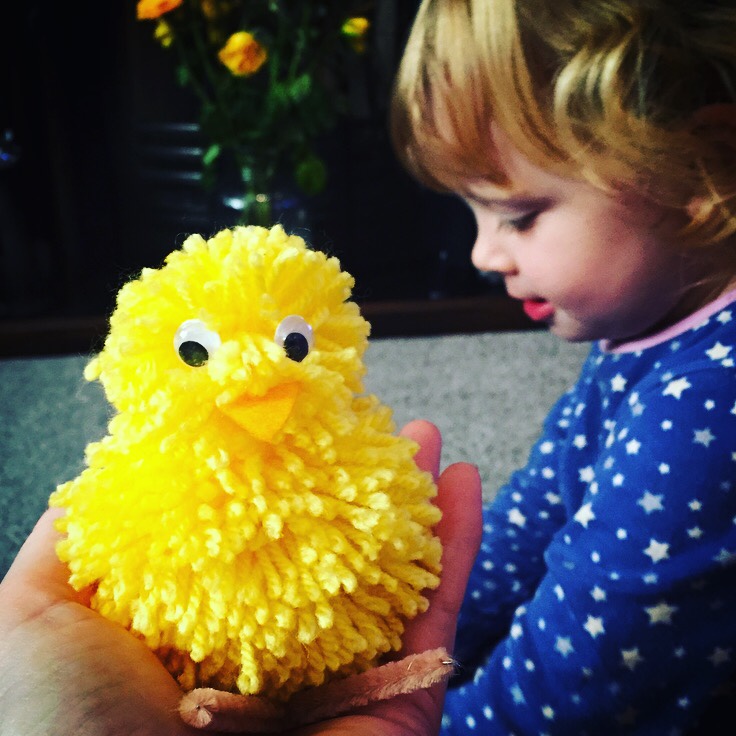
The next stage was glueing and decorating our pom-poms to make them look like Easter chicks! This was the fun part. First we glued the smaller pom-pom on top of the larger one to make a body. We used normal PVA glue, but for something a bit more robust it might be worth an adult using a glue gun.
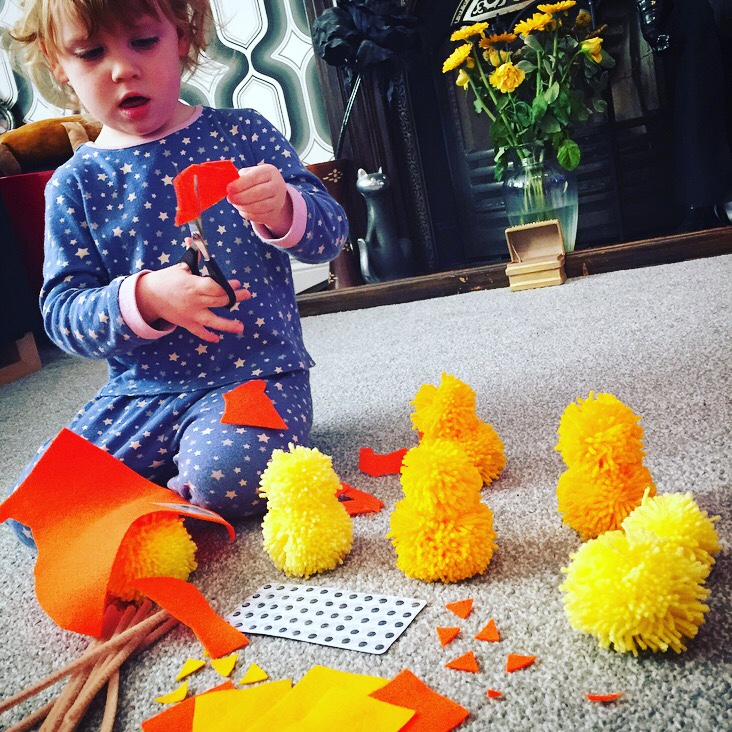
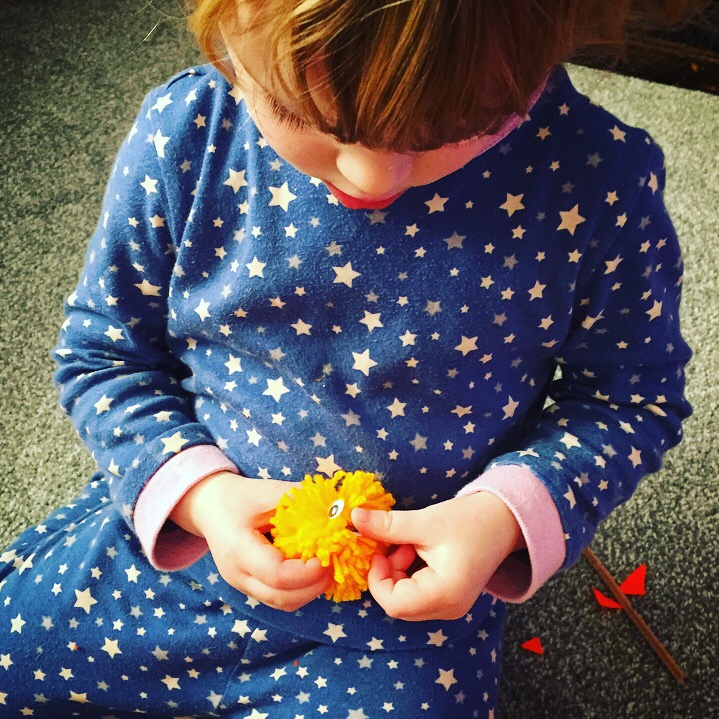
While we waited for the glue to set we cut out shapes for the beaks from bright orange felt. Make sure children are supervised with scissors! Felt can be hard to cut with blunt scissors so my mummy watched me like a hawk while I used hers. We used a little PVA glue to stick the beaks on the woolly heads. Next we added goggly eyes. We used the self adhesive ones on a sheet which we picked up from Hobby Craft. To finish our little chick creation we stuck pipe cleaners to the base of the chicks creating little feet.
We hope you agree that they look super cute. It was relatively cheap to make with all materials coming to around £10 (including the Clover pom-poms machine) which we’re going to use time and time again! The Easter chicks we made are going to don my Easter bonnet this year!
What have you made for Easter? We’d love to see links!
Love Bella x


I remember making pompoms when I was little! I have a houseful of kids tomorrow for Good Friday – I am going to print these instructions and have a crafty day – along with a cake making day… What have I let myself in for?!! Thank you for sharing this xx
These look great!
If we get time think we will have a go x
These pompom chicks look cute I always struggled as a child to make pompoms.
The ‘traditional’ way is time consuming and fiddly, that’s why the Pom-Pom maker came in really handy! Great for kids!
Those Pom Pom makers look fab, I tried to make my own and failed miserably
We’re usually awful making pom-poms! That’s why the Pom-Pom maker was a joy!
These look like great fun to make. Love that last picture. We’ve been a bit rubbish this year and haven’t made anything other than an Easter bonnet. X
Too cute! I love making pompoms. There’s something very relaxing about it!
Yeah! Totally agree! My mummy found it very therapeutic 🙂
cute! Both of my kiddos would love these and I think it’s even simple enough for me to manage!
That’s a cool contraption. I want one. I have been making pompoms by wrapping them around my hands but they’re never fluffy enough. Sarah #FabFridayPost
I used to love making pom poms when I was kid! I love the look of that pom pom machine too. Looks like it would be a lot of fun 🙂 #fabfridaypost
Oh my goodness, how things have come on! This machine is such a great idea, no more cardboard rings. Such a fun and lovely crafting idea:) They look so cute:) x
Mainy – myrealfairy
#fabfridaypost
Aw these look so cute, you make them look so easy x
These are ridiculously cute! I have always wondered how to make pom poms, I didn’t realise they were so simple to do. I can’t wait to try this
Wow! So easy to do and very cute too! 🙂 I am pinning this under “Easter”. Thank you very much for linking up with us on #FabFridayPost
Oh these look so cute! Mummy used to make pom poms when she was in the Guides! That little machine is very clever! We hope you are having a lovely Easter. Ickle Pickle x